
Look match


"Look match" in LmBox takes a source image and a reference image and works out a .cube color filter on your computer. The picture moves toward the tone and dominant colors of the reference. When the preview looks right, save it and apply it straight to a Premiere Pro or DaVinci Resolve timeline. The sidebar icon is .
Video tutorial
What you will learn
- Open this page from the sidebar, then drop in or capture the source / reference
- How to switch between Wipe and Links, and what each is good for
- How to tune Amount, Temp, Contrast and the precision level
- How to pick a dominant color pair, fine-tune HSL, and when to re-link sample points
- The difference between Save and Apply LUT, and what to expect when the framing is the same or different
Guide
This is the main Lab guide. To browse, preview and apply the filters you already made, see LUT library.
What it solves
| Pain point | What this page does |
|---|---|
| You want your footage to move toward the colors of a reference image | Drop in a source and a reference, and a .cube color filter is generated on your computer |
| The same framing, only the grade is different | Matches by the corresponding picture, and usually fits closely |
| Different framing, you only want the overall tone | Matches by a few groups of dominant colors; do not expect every area to line up |
| You need the result on the timeline | Apply LUT here directly, no need to open LUT library first |
| You want to fine-tune before saving to disk | Drag the sliders and watch the preview live; a new timestamped file is only written on Save / Apply |
Before you start
- Install and open the LmBox desktop app
- In the sidebar open (a top-level page, not inside the LUT library sub-routes)
- If Get this feature shows in the top bar, unlock the feature on your account first
- To Apply LUT to the timeline: pick Premiere Pro or DaVinci Resolve in the sidebar and check that the editing extension is connected. In Premiere Pro select the target clip first; in DaVinci Resolve park the playhead on it
Note
This page only generates and applies .cube files. It does not write a DaVinci Resolve .drx. Matching runs entirely on your computer, not in a web cloud.
Quick start (shortest path)
- Source: drag a still or image into the dashed area on the left, or click the capture button next to the title to grab a frame from the connected timeline.
- Reference: drop or capture the same way in the right column. When both images are in, matching starts automatically, and a loading hint may appear next to the Source title.
- Switch between Wipe and Links in the top bar and check that the colors move toward the reference.
- In the adjust card below, drag Amount (default about
0.8when you open the page), Temp and Contrast. If needed, change the precision (17/33/65, default33). Double-click a slider to reset it to its default. - If needed, select a dominant color pair and fine-tune hue / saturation / lightness on the right. With Wipe off and Links on, you can also click two points to add a sample, or drag a circle to move it.
- When you are happy, click Save (writes to the folder selected on this page) or Apply LUT to apply it straight to the timeline (this also saves a new filter to disk).
The preview is a light one, so parameter changes refresh quickly. Only Save / Apply writes the full .cube, with a millisecond timestamp in the file name, so it normally does not overwrite the last result.
The desktop screen
The workspace has two columns: Source on the left (you can wipe to compare after matching) and Reference on the right. Below is the adjust card (sliders, the dominant color strip and the HSL of the selected pair).
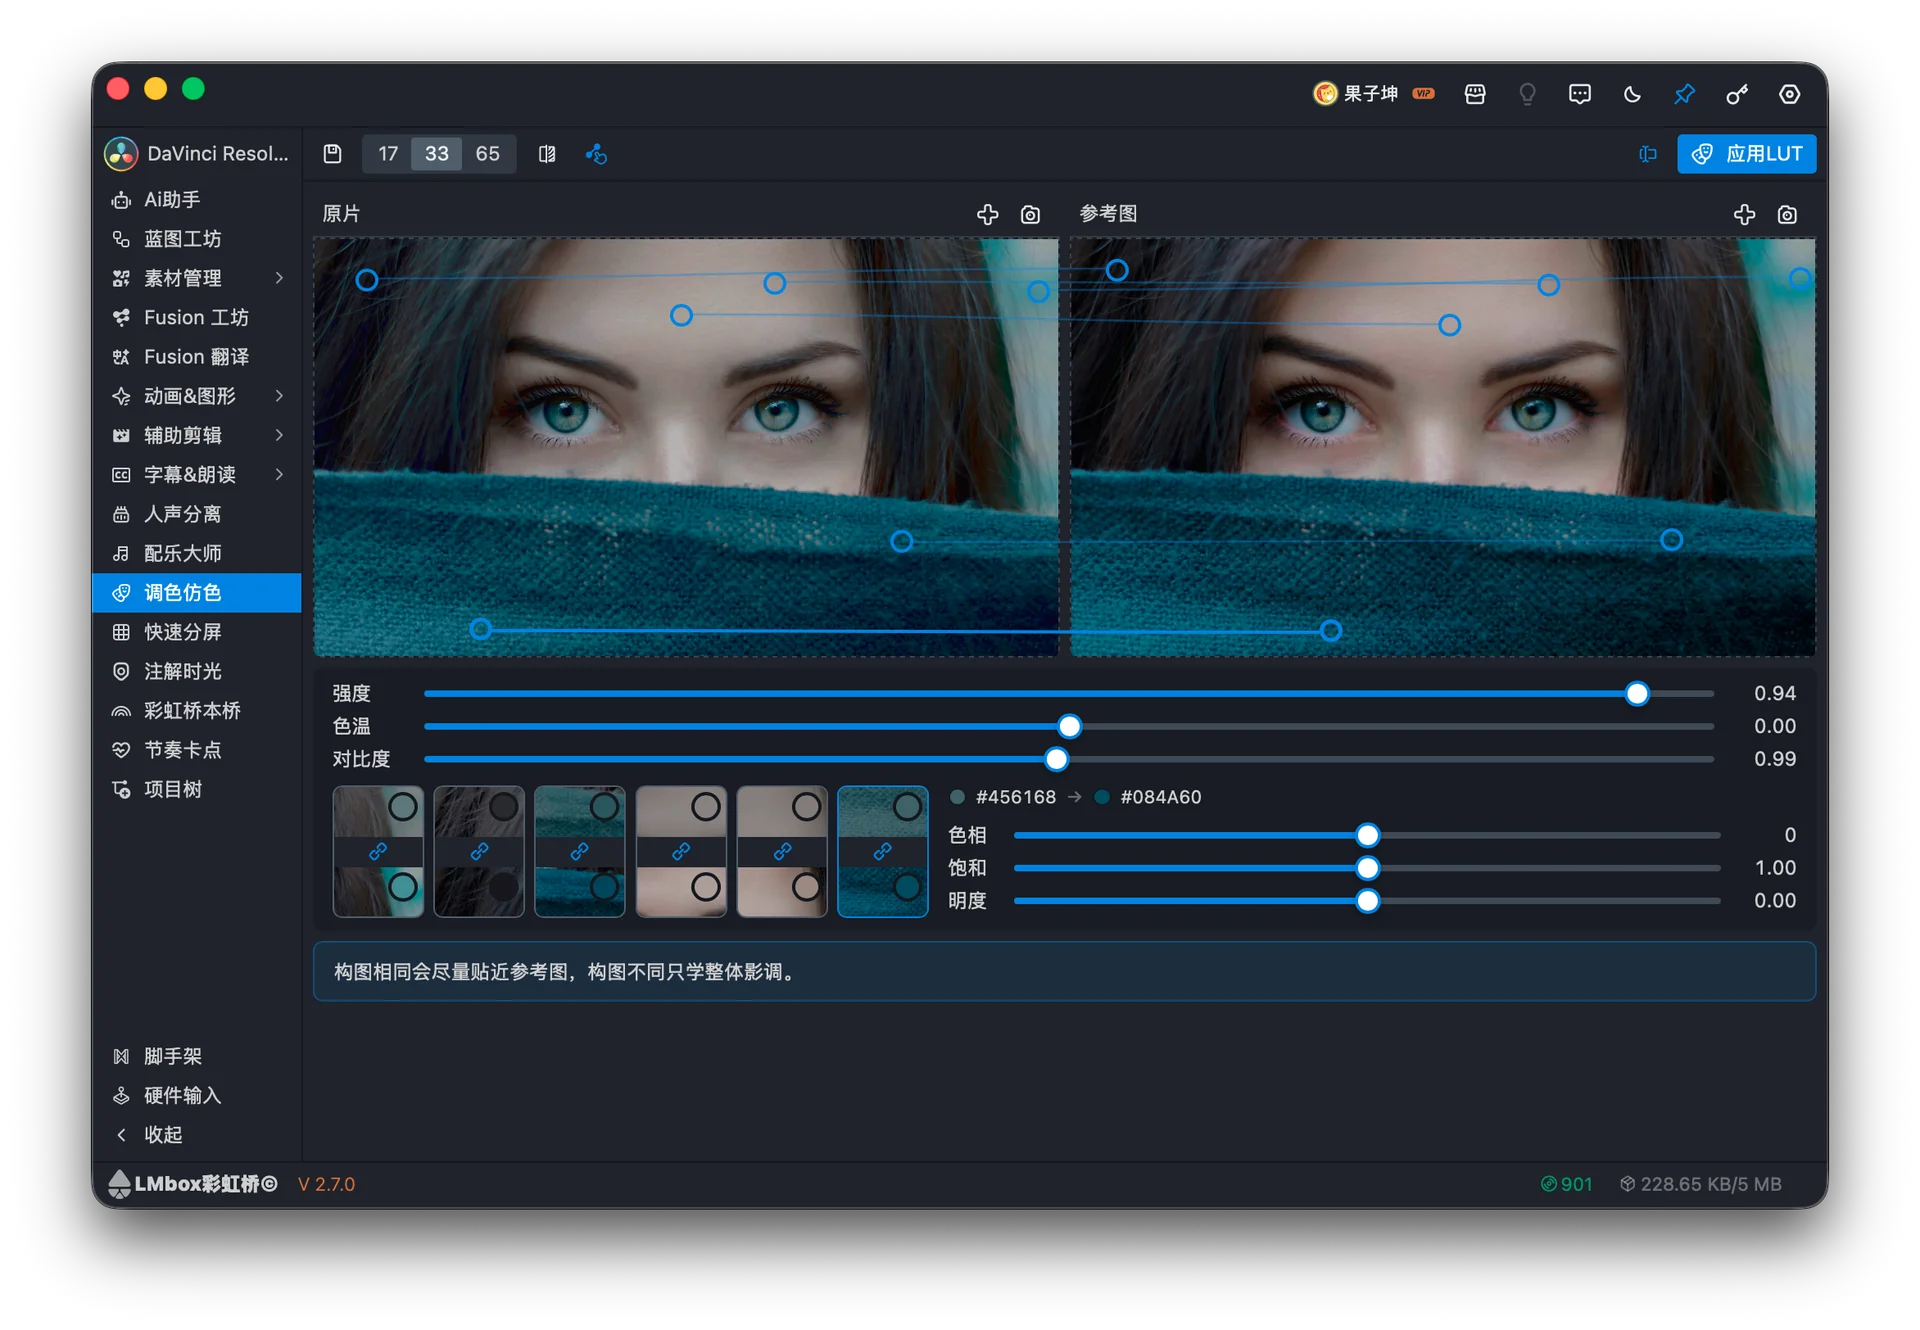
Figure: Look match with the Source / Reference columns, Wipe and Links, sliders such as Amount, and dominant color pairs. The screenshot shows the Chinese interface.
Screen areas
| Area | What it does |
|---|---|
| Sidebar | Opens this page |
| Source column | Drop or capture the picture to match; after an image is in, the matched preview shows |
| Reference column | Drop or capture the target tone / dominant color reference |
| Capture button next to each title | Grabs a still from the connected host into that column (you can replace it) |
| Top bar Wipe / Links | Mutually exclusive: either wipe compare, or dominant color links, one at a time |
| Amount / Temp / Contrast | Global fine-tuning; drag for a live preview, written into the filter on Save and Apply |
| Precision | 17 for a faster preview, 33 default, 65 finer and slower |
| Dominant colors strip | One row of swatches each for source and reference, showing the pairs now used for matching |
| HSL on the right of the selected pair | Adjusts hue, saturation and lightness of the selected pair only |
| Save | Writes the current result as a .cube to the selected folder |
| Apply LUT | Saves to disk, then applies to the timeline with the same rules as LUT library |
Wipe and Links
- Wipe (default): wipe left and right on the source to compare before and after. While Wipe is on, the source is mainly for wiping, not for picking samples.
- Links: with Wipe off, the dominant color sample circles and links show. You can select a pair, drag a circle to move it, or add a link by "one point on the source → one point on the reference". The selected link is more prominent.
The two are exclusive: the one you click is the one you see. When you go from Links back to Wipe, the wipe refreshes with the current preview result.
Dominant colors and fine-tuning
The engine gives several dominant color pairs (shown as swatches). You can:
- Select a pair and fine-tune the reference-side color with HSL on the right (a local preview while you drag, then synced with the engine when you let go)
- In Links mode, move the sample points. After unlinking, that side keeps its own look based on the nearest dominant color, and you can link again when needed
When the framing is the same and only the grade differs, the whole picture usually fits better. When the framing is very different, treat it as "learning the overall tone" and do not force every area to match. The app also reminds you before applying:
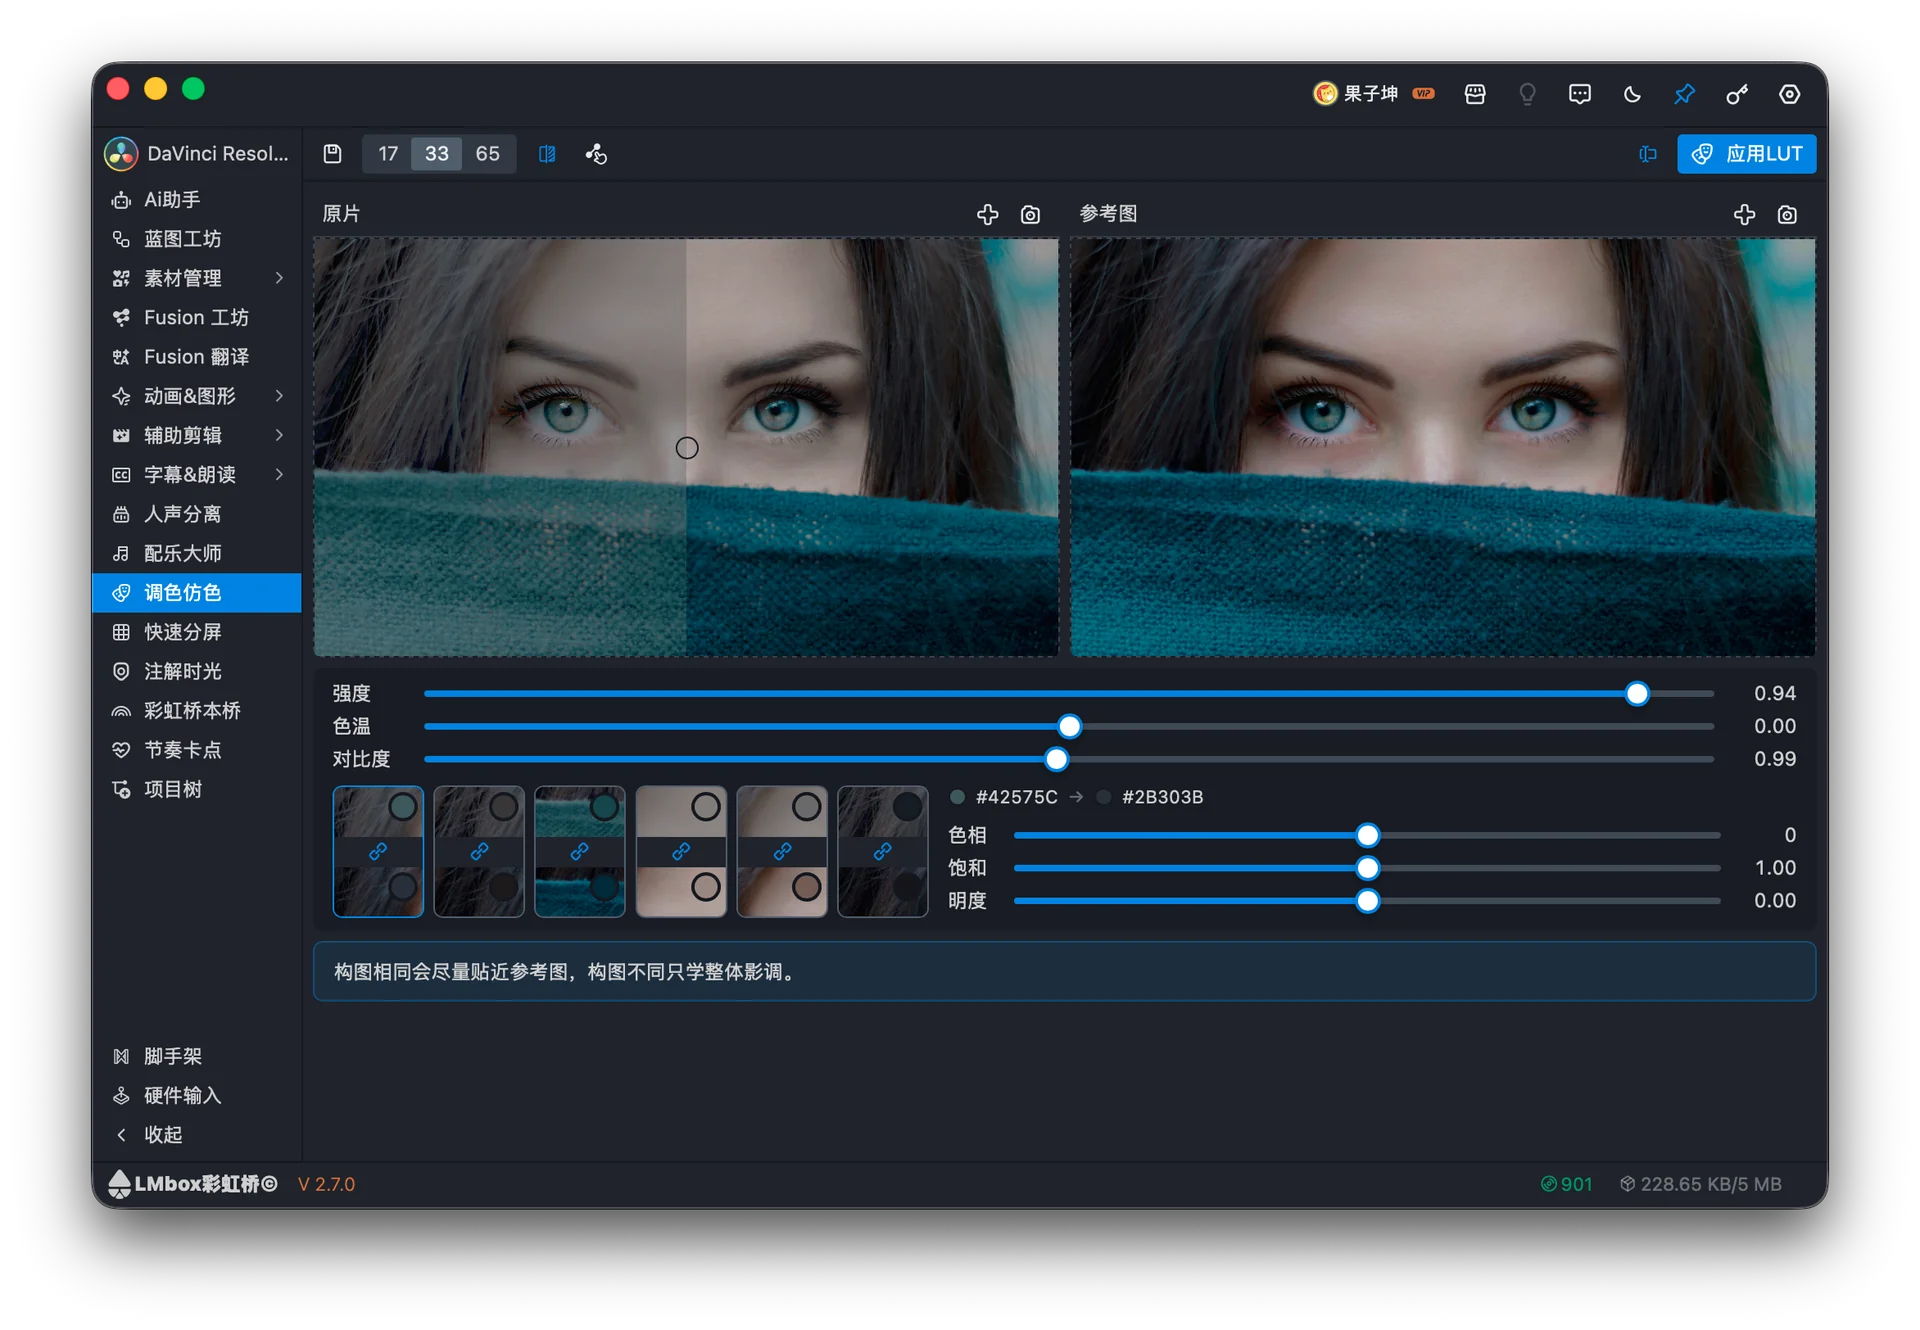
Figure: the expectation note before applying a LUT, about same framing / different framing (follow the current app wording). The screenshot shows the Chinese interface.
Save and Apply LUT
| Action | Result |
|---|---|
| Save | Writes a timestamped .cube to the selected folder, without forcing it onto the timeline |
| Apply LUT | Also saves a new file, and uses the same apply path as LUT library (Premiere Pro on the clip / adjustment layer; DaVinci Resolve source clip Input LUT or grading node, following your current LUT apply mode) |
To browse, search or apply to another clip later, open and mount the saved folder in the sidebar.
FAQ
Nothing happens after I drop in both images?
Check that both sides have a valid image (no empty column). Big images or the high precision level are a bit slower. Look at whether the Source title still shows loading. If there is still no result, try a smaller still, or set the precision to 17 to try the preview.
Can Wipe and Links be on together?
No. They are exclusive in the top bar, so the wipe and the sample points do not fight over the same actions.
Amount at maximum, still not like the reference?
First tell whether it is "same framing with a different grade" or "a totally different picture, learning the tone". The latter can only get close to the overall mood. You can try: fine-tune Temp / Contrast, change the dominant pair or the link points, then save and compare.
What does double-click on a slider do?
It resets that slider to its default (for example Amount about 0.8).
Will Save overwrite the last one?
Normally not: each Save / Apply uses a new timestamped file name. Still watch the selected folder, and do not rename a file to the same name by hand.
Can I export a DaVinci Resolve .drx?
Not in the current version. The path is .cube plus the existing LUT apply flow.
Is there a matching node in Blueprint workshop?
It is planned for a later phase. This guide only covers the top-level desktop page.
How is it different from a web-based color matcher?
LmBox generates a .cube on your computer that works in professional apps, and can apply it straight to the timeline. It does not rely on browser compute, and you do not copy files into a system LUT folder by hand.
Further reading
- Lab features overview
- LUT library: preview and apply the filters you already have
- Install the desktop app
Release notes
2.8.0(approx.) Look match arrives in the sidebar: a source plus a reference generates a local.cube, with Wipe / Links, Amount and dominant color tuning, and saving and applying a LUT.- The guide now has screen shots, step-by-step instructions and an FAQ, and the overview entry now points to the full guide.